Event Organisation
- airahman

- Mar 10, 2020
- 26 min read
Updated: May 17, 2020
As I wanted the event to be a reflection of my skills and knowledge gained in 601, I wanted to promote and advertise everyone that I had worked with during the module too. Therefore, my first step was to message Greg Moseley and Aiden Horsley, explaining my concept, gaining their feedback and seeing if they would be interested in helping my vision become a reality. Confirming my first 'act' of the event, Healthy Minds will be headlining, promoting their positive impact on the Leeds community. In addition, I will look to enlist the help of other collectives such as BabyStep, to reinforce the lineup to engage a larger audience to attend the event.
The most important aspect of organising this event for me was finding the perfect venue. As the concept is to involve DJs, motion graphics and a new clothing line, the venue had to have the space to accommodate for all of this, whilst still being in a good location and accessible to as many people as possible.
My immediate response to this dilemma was to message Greg Moseley, a close friend who will also be a DJ at the event.
[SCREENSHOTS]
Having a local DJ that is constantly busy and performing at various venues proved to be very helpful as he was able to tell me about different locations, prices, pros and cons and give his own personal opinion after performing and also visiting these clubs/venues/spaces. I also wanted to expand the possibilities and see where my audience/the public might want the event to be. In order to do this, I took to social media, specifically Instagram, and put a poll/question out to my followers asking what venues they generally prefer to go to. This also allowed me to gage the amount of people that would be interested in coming and what sort of audience I will be able to appeal to.


This is the list (updated) I collated of potential ideas, followed by responses or information that I had received regarding the availability or likelihood of hiring.
Costing
One major concern for this concept was funding as, to get this event to the standard I have envisioned costs include: t-shirts, embroidery, custom clothing labels, venue hire, packaging, stickers and other minor costs that will need to be accounted for as I need to budget well due to a currently poor financial situation. (Cost list on memory stick)
This (left) is the current running total of my costs that I have amounted (17/01/20): conversing with Peco ltd. about embroidery costs, plain t-shirt costs from buytshirtsonline.co.uk, clothing labels costs from contrado.co.uk and other rough estimates including venue hire (assumptions based considering previous venue hires and scale of event). With estimates already over £600, it became apparent that I may have to find help in order to present my event to the standard envisioned as I am certain further production costs will accumulate.
Having spoken to Greg Moseley, as well as Deanne Jopling, about potential venues - I was pre-warned about how expensive some are to hire, as well as the requirements that some venues demand when renting their space. Looking at potential funding options, I reached out to the student union, after a talk from university president Aderice Palmer-Jones. Having worked with her before at the 'Find and Seek' pop-up stall at the Corn Exchange, maintaining this relationship helped me have the confidence to openly talk to her about financial struggles and the benefits that this project/event will have with my work and university course. However, after speaking to Aderice it became apparent that the funding that was on offer from the Students' Union was only available for external use (not inclusive of university/degree projects). This meant that I would have to fund everything myself, although not ideal, the union mentioned that they would be able to help with other small factors such as providing clothing rails for me to use.
Teasing little snippets of works in progress, I tried to keep my audience enticed and up to date with everything going into this project whilst also promoting my art account (ai.noodles) and my brand.


Venue Hire
Finding it difficult to choose a date that suited all, I used Instagram to try and reach more people to see what the majority thought on a good event date.


My next step was to begin emailing all potential venues to see if they were available, even if I knew there was a very slim chance. (List of potential venues on 'To-Do List' on memory stick) Below are some initial emails and messages sent to different venues and friends that have either hosted events or worked at the venues in the past. With a rough idea of the date I wanted to host it on thanks to the polls on instagram, I began sending an email out to all of the viable options.


Struggling to find a venue that I really wanted to host my event at that was free on my particular dates was difficult, having rejections or no replies from almost every one. Distrikt was looking like the only viable option, as a free location, a little bit further out in town, I was willing to settle on the fact this would be my venue. However, after calling Distrikt bar to confirm, I received a very late reply from Alice Hyam who organises events for Belgrave and Headrow House (Super Friendz), letting me know that although the weekend I enquired about was not free but the Monday of that same week was available. This came as a shock as Chris Impet, who I was referenced by James Kay (screenshots above), immediately told me that they were fully booked until July and there was not any possibility of hiring the space on any day at all. This helped me realise that it's worth contacting multiple people, even if they work at the same establishment, as the response you receive really depends on the work ethic and type of person you manage to get in touch with.
Poster
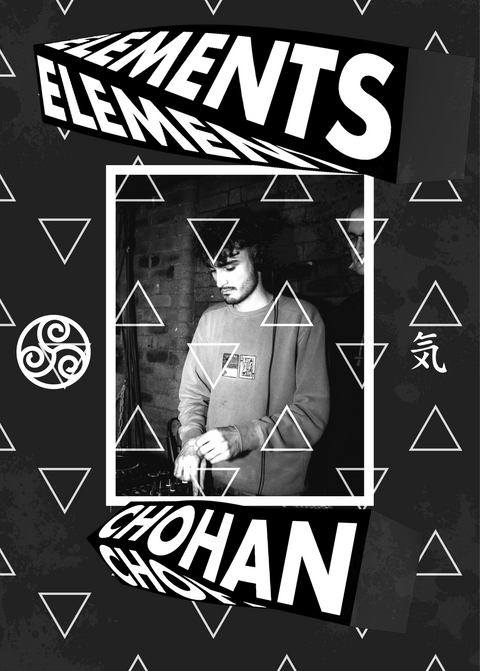
With Belgrave Music Hall & Canteen all but confirmed, I got to work on developing the branding for the night, starting with the poster. Having learnt a new skill in last module using Adobe Illustrator to create 3D-looking splines, I wanted to try and implement them in my poster design. The main idea was to create a collection of 4, almost imitating as collectibles, as people always have varying preferences. Creating one for each element, essentially it will be 1 white (air), 1 blue (water), 1 green (earth) and 1 red (fire). I wanted to try and make it relatively rudimentary; making it clear and obvious to the audience what the posters represented.


I decided to keep my social medias up to date to raise awareness of the event and how the process is coming together. In continuation of this, I posted a lot of my design work to varying groups, trying to get assessment on what the public thought. Receiving a lot of positive feedback, the majority of the responses favoured the water poster as it has a good directional flow from left to right and the colours are the easiest on the eye and compositionally the most aesthetically pleasing.
I wanted to test a variation of designs until I was completely happy that the poster represented both Gemini Branding and the overall aesthetic of the event. This meant experimenting with a variation of design processes. As a lot of my inspiration came from illustrators and simple posters, I wanted to continue using illustrator to develop another set of 4 posters. This time opting to direct the designs towards the animated series 'Avatar: The Last Airbender' that the night is themed around; I began to create a renditions of the character, making a variation of myself to make it more relatable and not directly copied.
Below is the process video portraying how I implemented a cross-variation of a selection of images of the series to create one final outcome. Taking inspiration from the colour palettes and character design, I synergised this with assets such as the Gemini Branding logo to create a more coherent, relevant group of images.


After experimenting with my illustrative style to try and come up with new ideas for the poster I knew I wanted to implement some motion graphics into the poster, making it animated, so the theme of the night could be resembled and replicated in what is shown at the event.
Using a mixture of Photoshop (to create the text panel) and Cinema4D, I started to create a custom 3D design displaying the word 'ELEMENTS' to warp and customise further. Using modifiers such as twist, jiggle and soft animation settings, I was able to keyframe the cube shape to turn, create a fluid movement and expand and contract on a continuous loop.
Taking this further, I took to resulting animation into after effects to experiment with composition, colouring and an overall poster layout. Realising that within sharp movements it becomes easier to disguise colour changes, I experimented with switching the colour of the text as the cube twists; four colours, one to represent each element, white, blue, green and red.

Originally opting for a white cube, I attempted making it black, as I thought it'd experiment and try both before settling on a final design. After going to a group tutorial and asking various others, the clear favourite was the black design, so I decided to use it for my final finished poster.
I decided to take a segment of the animation, as it renders in separately-framed png. images, I took a frame that looked most aesthetically pleasing from the original animation and colour corrected the entire image and retyped the text - to ensure it was crisp and clear. Working from a 1920x1080 pixel format too, I had to modify the text layout and background to fit an A4/A3/A2 ratio for printing.


After paying my deposit for the night, I went ahead and organised a meeting with Alice Hyam about looking around the venue. This was to get a better feel for the space regarding decorations, projector and screen space and layout of the venue, helping me understand what I will need to make my vision come to life.
Rotating Elements text loop
Creating more promotional material for the event, I decided to experiment with a new technique I'd learnt in Adobe After Effects, creating a 3D text effect, allowing to create a loop by creating the rotation to match 360 degrees exactly at the beginning and end of the animation. I creating this animation using the same generic colour scheme as the rest of my material in order to create a coherent collection of graphics: implementing the logos/symbols on the side to reiterate what they are and create a repeated motif to ensure it is recognisable by the time people come to the event and see the motion graphics & t-shirts.
As a free event, selling my t-shirts, I wanted to add another small component that everyone could enjoy, without spending money. I always love really small pieces of memorabilia that I can keep that reminds me of specifics times, dates and events in my life, so I wanted to create something like that. The best option to fit my aesthetic for me was to create stickers; I love stickers, I have loads plastered all over my laptop, on my wall, everywhere and people often find them as a collective and want to get as many as possible.
I always find the most satisfying those with clean edges, similar to a png. image in graphics, it doesnt create a distracting background - so I wanted to try and keep my designs clean-cut where possible.


I plan to have these displayed around the table that I would have setup at the venue to take payments for the t-shirts, where anyone that is interested can take a selection. Printing anywhere between 12-16 stickers a page, they won't be too expensive to get made and is again a way of promoting my own brand through little spending that I think people will appreciate.
Belgrave Music Hall & Canteen (The Venue)
I wanted to revisit the venue space, as although I go regularly as a customer, there are a lot of aspects to consider as an event organiser that I might not have recognised before as it's not a vital factor when visiting. I wanted to use this opportunity to take photos of the space to gauge a better perspective on the size of the space, where the fire exits and doors are and how I might be able to re-arrange the furniture and layout of the space to curate the space the way that I envisioned.


Visiting Belgrave reminded me how much space there was to fill. I was offered an option to cut off the majority of the venue and just use the bar space (first two pictures) as they often do for smaller events and gigs. However, I was determined to push the advertisement, invitations and publicity of the event to gain a much larger following. I've been to many events in the past in large venues and the atmosphere changes heavily depending on how busy it is. It is often awkward and eerie if there aren't enough people to fill the space. In addition, the main centre piece of the event is the graphics which I wanted displayed on big screen, which they only have available in the larger space.
As when I visited I was in a bit of a rush, I didn't have time to double check my photos before leaving. However, after buying a CF card reader and uploading my photos, I realised I wasn't happy with the photos I managed to take. Under recommendation by Ian, I wanted to create mockups using the photos I took to visualise what my event will look like. Unfortunately, the lighting in the photos is harsh and I didn't manage to capture the full venue in great quality so creating realistic mockups is difficult. I aim to visit Belgrave again within the next week or two in order to get better images.
[There is around a 2 week gap in event organisation here, as I began focusing on the graphics for the night more: https://airahman.wixsite.com/lauvc602/post/cinema4d ]
With the event date fast approaching, I wanted to start making announcements on the facebook page which I could then also share on Instagram to reach as many people as possible with the help of people sharing and word of mouth. I started putting together announcements with a small bio from each DJ/collective, along with links to EPs or music that they were wanting to promote.

Having worked on editing various works for club nights and events, I recognised that a lof the time they have announcement posts with custom artwork relating to the event itself. These are some examples of ones that I've seen or worked on with the DJs that will be performing at my event


The aim was to create promotional posters to upload with each DJs bio and info segment - relating the poster to the element that they'll be representing on the night; mirroring the design of the original motion graphic poster, using the same background, creating a custom moving-cuboid for each and referencing the element symbol and Kanji. When getting into the swing of making these promos, the fear of corona virus was gradually growing, creating an uncertainty of the near future and all events and plans to come. This made me really scared as I wasn't sure what to do if my event couldn't happen as I've spent so much time, money and effort into making sure all of it was prepared to the best of my ability.
Unsure about the next steps, I carried on producing work and making sure the finer details were in check for the event, such as buying decorations like LED lights to place around the venue. My intention was the have LED strips around the edges of the room that change colour depending on the element/DJ performing; matching the motion graphics on the screen. I know this is possible through a remote control, as I have a set in my bedroom that have worked perfectly for the last 2 years. The only extra thing I'd need to do is PAT test equipment before using it at Belgrave; again this is a routine I am familiar with, working at the Barn Theatre as part of a small theatre production company, using equipment and technology - it has to be certified before using an tools needing plug sockets.
COVID-19 Pandemic - Cancelling event? & where to go
If event falls through due to Corona Virus:
Virtual Replication of Belgrave?


As my event got ever closer, the spread of corona virus became more serious and worrying. I was hoping to continue hosting my event, regardless of the virus, however under much consideration, I decided that hosting an event under the volatile and unprecedented circumstances would be selfish, stupid and the wrong thing to do. Although I received relatively good feedback from those in Leeds about continuing, I morally was not willing to put the lives of others at risk for my university project.
Keeping very organised; setting myself tasks; keeping track of every element to the project; I felt a huge loss in motivation and meaning to the project with nothing I could do about it. I'd pre-planned every aspect, making constantly updated lists to ensure I could complete my uni degree to the best of my capability - aiming for a first. With all this being said, the pandemic completely ruined my work ethic and productivity, finding it near impossible to pick back up to the speed I was working at before whilst planning and preparing for the event.


This virus meant I had to completely rethink backbone of my project and reimagine it in a way that still represents what I had first intended.
After my portfolio review with Beth, I was unsure what I was going to do, as I wanted to create a visual recreation of Belgrave that would be VR ready for the end of year show. However, I was unsure my computer would be able to hack it, as I didn't have enough storage on my SSD, and for some reason I couldn't download it directly onto my hard drive. Beth suggested created a 'Pitch Pack', of which I could then present to future clients about hosting an event at their venue or workplace, etc. After conversing with Ian too, this seemed like the right step as it shows a lot of professionalism and is a good response to the whole pandemic. I decided that an InDesign document might be a good format to complete this task in as it will keep all photos and text clear and crisp and can easily be formatted for online submission.
Making a Pitch Package
1. Hook
2. Interesting Title
3. Paint the Picture
4. Tell stories from experience
5. End with a conversation
1. Focus on client & objectives
2. Lead with a strong value
3. Keep it short
4. Tell a story
5. Make it visual
6. Don’t skimp on photography
7. Listen, listen, listen
8. Be humble
9. DELIVER ON YOUR PROMISES
InDesign document
Unreal Engine & VR
Following the cancellation of my event, I wanted to experiment with something I had seen on my visit to Potion Picture in London. An intern, Jonathan Furtado, was working with software that I had never seen before. After we were done with the tour, I went back and asked him a few questions about what he was working on, what software he was using and why, etc. He explained that the software was called Unreal Engine, made by Epic Games; explaining it is the software used to create games such as Fortnite and the software is completely free unless you're taking advantage of the game development program and selling it, of which they take a certain percentage of sales. Jonathan explained how he was working on a virtual reality series, where viewers could immerse themselves in his creation using a VR headset and that this was the future of design. Unreal Engine runs real-time rendering so, unlike Cinema4D, you wouldn't have to wait around for hours or days to see the final outcome, it would render as you make it.
Researching this further once I got back to Leeds, I tried to download the software to test it out and see if I could teach myself the basics. However, alongside all of my Adobe Software on my laptop, even though I store all my files on an external hard drive, there wasn't nearly enough space on my laptop. I then tried redirecting the file save to be directly to my external hard drive but that didn't work either, as the program requires some SSD storage in order to run, meaning I'd have to delete a lot of stuff on my laptop in order to run Unreal Engine.

Deciding to take the risk, I deleted all adobe software and the entirety of my photo library in order to try and download it onto my hard drive. This didn't go as planned, as after doing all of this an Epic Games notification came up saying it wasn't possible to save it to my hard drive as it's password protected; meaning because of the formatting of my hard drive, it was impossible to download any external programs onto it and run them.
Researching into this, I found I'd have to restart my laptop in safe mode and reformat my hard drive completely, meaning I'd have to wipe the entire contents of it (my entire third years work). The only solution that I could come to for this was to order another external hard drive, using more money that I can't afford to spend due to the cancelled event and so much planning and spending. Reformatting the new hard drive, I was able to download the software onto it and run it for the first time.


Opening a preset architecture file, the viewpoint and layout was not what I was expecting at all and found it very hard to navigate. I decided to close this, watch a tutorial and figure out what kind of file I should be working in and how to navigate through it properly before attempting to run. Learning that it's easier to use a 'Game' layout, I began with a basic layout including starter content to help me build the foundations.


Struggling to place things in the right place easily, I started to drag my camera so I had a birds-eye view which I found easier to navigate as you can assume the scale easier and see where edges line up properly. However, this became frustrating when I then wanted to go back to ground level and edit something that way. I then found you can change the camera site, much like that in Cinema 4D - from perspective, to 'top', 'right', 'left', etc. Each has it's own purpose, making it easier to edit the height, width and depth of an object and assuring they align; using perspective to ensure it looks right from ground level.


Attempting to model a replication of Belgrave from memory, I wanted to lay out the basics first before adding any detail. I started by creating and adjusting the walls until they looked correct in 'perspective' view, before adding where the stage would be, followed by the steps and raised levels and the connecting wall through to the bar area.


One aspect that I knew I had to get right is the elevated levels of the events room. As I'm sure you know, if you've visited it before, the tiny stairs offer an elevated platform where there are seats in a very small amount of space. I'd like to go back to Belgrave before deadline if at all possible to take some more pictures of the venue space, as I don't have great reference images to use so getting everything to scale and getting everything to look proportionate is very tricky.


Exploring various YouTube videos of people using Unreal Engine to create architecture, I picked up on some small tips and ways to simplify building, such as using box brushes to create walls, and using another box with the subtractive brush type to remove a custom space away from the wall already set. This massively helps when creating specific sized doorways or gaps as the preset 'Wall Door' in the programs starter content is very difficult to manipulate and get the right size.


Working on creating a realistic replica of the venue, I referenced back to my original images a lot and to make it as close to reality as possible, I spent a lot of time re-creating textures, colours and layouts in illustrator so it's easier to import and customise in Unreal Engine. Below is the result of the material I made in illustrator for the bar in the back section of the events room.


I wanted to remove the use of plain black walls and recreate those of Belgrave. With two varied patterned walls, I used my photos of the venue as reference images and began to recreate the patterns to the best of my ability in illustrator to create the abstract objects. Using the pen tool to create the white objects, then using a textured brush tool to create the black pattern/texture over the top.


I followed the same routine to make the left wall pattern, then applied it to a new material to stretch and put on the wall in the replication. I tested it on both sides to begin with to experiment with change the dimensions of the wall. I personally think it looks quite smart with matching walls.

Changing the floor texture to a lighter wood makes it more similar to Belgrave itself, applying the red wall texture to the designated wall, the screenshot below shows a point of view from the furthest corner in the main events room. There are still missing textures from the sound and technicians booth on the left which I intend to recreate and apply through illustrator again.

Textures and materials
Creating textures and materials is very similar to that in Cinema4D, however after doing research and watching various tutorials and example videos, I found that people share their custom material collections a lot more and they're a lot more accessible online for free download.
Although I've already made custom materials and have started to get the hang of it, sites like this will be useful for more complex designs where I'm unable to create a realistic texture; as from experience I'm learning that it can be difficult to make the scale and texture embody what it would realistically look like.
VR Headsets and software
Oculus is by far the most popular, well-known company in the VR industry, offering 3 varying headsets to fulfil different needs. After some extensive research, I found it a tough call between the Oculus Rift S and the Oculus Quest, but for my Belgrave replication using Unreal Engine; the wired, more powerful, Oculus Rift S just takes the lead.
Oculus Rift S v Oculus Quest Review
Oculus Rift S Unboxing & Setup


Unfortunately, due to the current situation, all headsets are out of stock. As soon as they become available again and I am able to run the software, this will be something I look to invest in, however I'm also in need of a computer that is capable of running such advanced software so this is something that I will properly research very soon.
After working on the replica in Unreal Engine and explaining my project to my brother, he asked if I had thought about using Unity. As I'm very new to the subject of virtual reality design and game development software. Following my inspiration from my visit to Potion Pictures and talking to Jonny Furtado, I didn't research all possible options before diving into using the complicated software produced by Epic Games. I decided to take a step back from Unreal Engine, as my laptop was slowly becoming more and more exhausted by using it and I wanted to broaden my knowledge and expand my skillset, potentially using other software where fit.
"Unreal uses C++ programming language, pointers and memory management make it tedious", not recommended as first programming language
"Unity uses C Sharp, a very powerful and easy to use programming language, very easy to to use and very easy to get started", highly recommended to beginners that are starting out.
[ALSO PRESENT IN 'MOTION GRAPHICS: CINEMA 4D']
Computer compatibility
Getting in contact with Bora Jenkins, who I work with each year during Kenley Holiday Workshop where we are the crew who build set for an amateur musical production company. After chatting to a friend about my project and my dilemmas, he mentioned that Bora was in the process of building him a gaming PC, which is something that might come in handy for me. I've done research into building a PC myself, but as someone who's never built any form of computer from scratch before, I'm worried that I might do something wrong; especially considering I need relatively high specs for each of my programs, including Unreal Engine & Adobe Creative Cloud.

This website offers a 'system builder' element, which allows you to experiment with different stuff together and often finds the cheapest price and reports any obvious compatibility issues. It also has a function where you can share the link to your build, which Bora recommended I use and it has a few blog posts from people who have recently built machines.
My friend then got back to me with a mockup of a potential build for me, after telling him I was aiming to spend around £1,000 and telling him what I was going to use the PC for.

With the pricing under budget, I was excited at the possibility of buying the assets myself and putting them together. However, with my current financial situation, I thought it'd be best to save up and build it in the future; but it's good to have a basic knowledge for now and increase the likelihood of me doing it in the near future as I know my goal is obtainable. Another aspect that I need to look into on top of this however is high-quality monitors.
My need for a custom-built PC was re-emphasised during lockdown as I tried to do some work for a client: creating a 12 minute reel of motion graphics using my designs made for my event at Belgrave ([REF in blog.] Work-Related Learning -> Aiden -> 12 Minutes). After researching the issue, I discovered that it was a common problem and that Adobe themselves didn't really have a solution for it, so I looked on YouTube to try and help me.
Trying this technique, as the uploader mentioned, it severely slowed down the rendering time, to a point where it wasn't worth rendering. The immediate time that came up was 8 hours 11 minutes, to render a 12 minute video. I decided to message Aiden and tell him the difficulties I was having with it, which he replied that if I sent him to separate material he'd be happy to work on an edit himself. In response to this, I created a shared google drive folder and uploaded each individual element that I used for my edit, hoping this would help Aiden regardless.
Uploading the files to Google Drive, the time for upload was around 4 hours. This again, was a considerable amount of time considering it was unedited and needed a lot of work, cropping, editing, colour grading, etc. So I decided to try and render the 12 minute clip again, ensuring everything was completely shut down apart from Premiere Pro. For some reason, unknown to me, this time it worked completely fine.
XCODE & Swift - Sololearn
Explaining my project's new direction to my friend Harry, that studies at Goldsmith's University, he recommended I look into XCODE and Swift.
XCODE

Swift

To make the virtual reality idea more compatible for everyone's viewing, after showing the idea to peers I was recommended making a replica of the venue on something else too so that everyone is able to view it regardless of what software they have. For example, viewing on a mobile phone, Facebook, Twitter, Instagram, etc.
As an extension of my Belgrave replica, I also want to create a personal, rough rendition of what the viscom studio looks like and try and resemble how I would have intended my work to be set up if we had an End of Year Show at university, as I'm severely disappointed that the entirety of our EOYS is moved to being digital as I don't believe this website will showcase everyones work it's highest potential. I believe this could be something that I carry on working on after deadline too and potentially ask people to send me their work and how they envisioned it and see if I can collate a virtual reality EOYS for Level 6 viscom.
Deciding to revisit the Unreal Engine replication, I found out that Epic Games offers a marketplace for things such as materials, character meshes and other stuff. At first glance, I thought you'd have to pay for everything on the marketplace, however after watching a few more videos and tutorials on using it I realised they offer free products too. I wanted to look for character meshes to try and fill the space of my Belgrave events room creation.
There is a website/app called mixamo, part of the Adobe family, that offers an array of preset characters that can be downloaded and animated. Although I'd love to create my own custom character meshes, it wouldn't be possible in the time frame and with the equipment I have, as my laptop already severely struggles just running Unreal Engine.

I imported the downloaded 'Scanned 3D People Pack' from Renderpeople, and attempted to import a specific character from the pack. However, on first selection the character did not align with the mesh or floor so appeared floating in the sky. Unsure how to fix this, I attempted re-aligning the character's body automatically with the floor, however when I then clicked 'play' it was nowhere to be seen.


Watching various videos on importing marketplace characters, I was unable to fix my problem. I tried adjusting the character movement and physical settings, including the gravity and start point. This resulted in the image below when clicking play.

Although the character looks great, not sure I want him laying down on the floor whilst the viewer is walking around the venue space... I'll have to watch some more tutorials to try and understand the correct way to render an AI character, as I can currently only render them static or in the air.
[update] Looking back on this, I realised that it's because I wasn't importing the right mesh, I was just importing the skeleton meaning it was a frame with no structure or physical attributes so couldn't stand up or present itself properly.
After experimenting with the character meshes I discovered on the marketplace, I realised that the usage can be quite limited, as they are either static, or follow one specific movement on the spot. This became quite irritating and although I knew there was probably a method of coding it differently, I was trying to get the aesthetic right and focus on the movement and fluidity of the render rather than detail and realism of the characters.


Working through a tutorial, I wanted to implement different dances and movements to various character meshes as I wasn't happy with the preset characters standing still and looking motionless; I felt it took away from the VR experience. I decided to download and use a character mesh from Mixamo which is pre-rigged and easier to code to get to do particular movements. Initially I thought you had to have created your own character and exported it as an FBX. file in order to upload and use animations on this website. However, on further inspection, there are various free character meshes that you can download, already with all assets needed to carry out the animations blueprints; meaning you can go to mixamo, download a skin, download an animation and translate it straight into unreal engine with some coding to modify when, where and how it does it.
I want the dances I use to have a slight comedic effect, as I believe when people see something funny or others relaxed and enjoying themselves, it often makes the viewer feel the same way. Therefore, I used classic dance moves that are recognisable by all or goofy, silly 'dad' dances; the running man, . I knew I'd hit the jackpot when showing the simulation to my step-dad and he said "how have you got them doing my dance moves?".
I decided to email Chris Parkin, the head of IT at Leeds Arts University in order to ask for some advice on compiling and exporting my Epic Games Belgrave replication in Unreal Engine. As software I've never used before this project, I wanted to assure myself I'm doing it the right way for what I'm trying to accomplish, rather than being rash and potentially ruining it or not letting it live to it's full capability.

Decided to create a monochromatic colour scheme with the AIs, as I wanted them to blend in seamlessly, I felt the pre-registered two-tone blue was a bit too vibrant and took attention away from the venue. Also, with a dark colour representing the body parts, I found the dance moves I'd coded to each character easier to view.

As I'm unsure on the possibility of uploading this file for others to enjoy, I began contemplating other ways of getting this replication out there which made me think about my original plan if the event were to go ahead, which was to have cameras dotted about the venue recording the entirety of the night which I could then edit and create a showreel. This led me on to thinking I should recreate how I was going to record it in my Unreal Engine creation; placing virtual cameras where I would have in the night - screen recording the night 'in action' and compiling it in a short showreel/edit. Although the capacity of the venue will be limited to robot/ai figures and limited graphics due to my laptop storage issues, I feel this is a good response to the pandemic and how it has effected what my event could have been.


I tried to get sofas to look as close to the originals at Belgrave at possible, creating a red/orange and scaling the sofas to look accordingly

Attempting to make an edit of what I intended my final outcome to be if my event happened, I began recording in-game recordings of my Unreal Engine replication of Belgrave. This was difficult as my laptop already struggles with running the software, so running screen-recording software made it very slow and took a loss of quality as well. I created the edit in premiere pro, using overlays and adjustment layers. Trying to make something so obviously fake look relatively real, I reimagined elements like Facebook live reactions, CCTV recording and made them my own my adding them to a virtual reality scene.
This is my first, rough attempt at piecing some footage together. Looking back on it, there are a lot of awkward gaps which need shortening and replacing. As intended with my original idea, I want to implement some footage from the motion graphics as overlays and cutscenes to really highlight to reason for doing this event in the first place. I also need to create a section in my Belgrave rendition where there are t-shirts or hangers and a stand as the new t-shirt collection is a large part of this project.
Sending the first attempt to other art students, asking for feedback and criticisms, here is some of their responses:
"It looks good I would say the CCTV or whatever looks too tacky, in my opinions ruins it. You can make it so much sleeker, even it being in black and white gives it the idea that it's CCTV, you could just put a white box around it il show you a drawing of what I mean."

"I like the insta live bit that’s cool! Might need a bit of motion to it if you can because they wouldn’t be standing still if you get me?"
"Either more people or spread them out a bit more you know like seem a bit too empty everywhere else."
"The motion graphics in the background of the DJ is there a way to make them a bit clearer? but I get if you was trying to go for a projector look. maybe there’s anouther way, aswell as behind the DJ, you could show off your motion graphics? Because they are sick "
"Maybe at the beginning show what the venue is like empty without all your stuff then show what you would change and why you would put where? Like literally only a brief 5 sec where it shows it empty and then fade it into it being full and what’s changed?"


Making these showreels, I wanted to make them more seamless, creating fluid transitions and in sync with the music. Finding inspiration through other showreels I've seen in the past, I recall the speed of the playback isn't essential; meaning a lot of professional showreels actually increase the speed of the videos to sync it to the music or make it fit within a time-frame. I wanted to take the opportunity to promote as many people as possible; as that was one of my main aims with this project in the beginning. Therefore, I asked Amin Fouari, a close friend and recent graduate of LAU if he would allow me to use some of his music for my showreels. The current versions display music dubs created by garage DJ 'Mind Of A Dragon'. Amin demonstrates a similar style, focusing a lot on garage music but I would much prefer to use someone still coming through the ranks, as opposed to someone that already has a name in industry like MOAD.


Comments